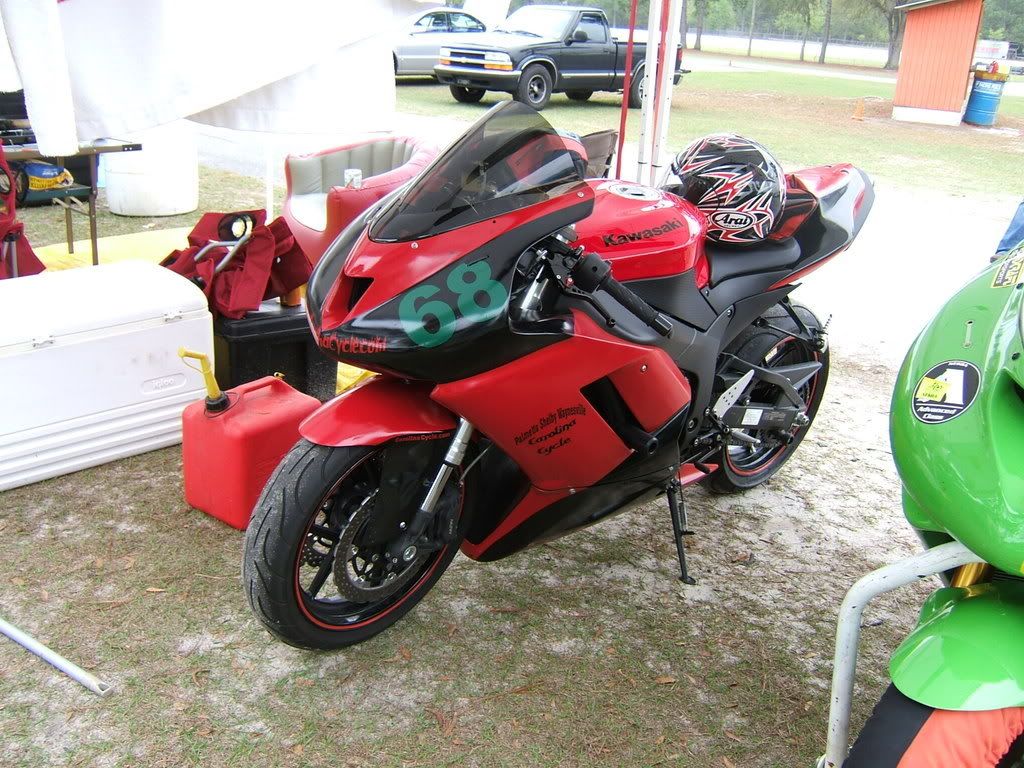
ANOTHER painting question

PJZOCC624

New Member
Okay, I know there's alot of techniques, theories, etc., about painting plastics. But I still have a question...

I'm repainting the plastics on the "new" bike. My estimation is that the plastics currently have been painted somewhere between 2 and 30 times. I can see a SILKOLENE sticker on the lower, so I'm assuming that I'm gonna run into some various decals as well. Do I...

a. Sand, then primer, then paint?
b. Wetsand,primer,paint? (If so, what the hell is "wetsanding"?):notsure:
c. Can I just primer over what's already there and then paint? (I'm gonna starting to disrupt the aerodynamics of the bike with another couple of layers I think....)
d. If/when I sand, do I have to go all the way to the, umm... plastic part of the plastics? In other words, can I just sand enough to get a base for primer and paint? Or do I have to get through ALL the old paint layers?:dunno:

e. Has anyone tried wallpaper on their bike??? I saw a REALLY nice paisley print at Home Depot that I think is just dreamy....:haha:

I'm not looking for showroom quality, will do a rattle can job, and am treating this like a test run for when I buy a new set of skins. But I'd like to do it the right and proper way.

Thanks!
 
OK, here's the quick and dirty.

First, wetsanding is sanding with water and sand paper. If you go to an auto motive store the 'wet/dry sand paper is black and comes in various grit ratings i.e. 220, 320, 400, 600, etc. Wet sanding cuts down the dust and mess.

I just 'Rattle canned" my seat cowl. Here's what I did for surface prep.

The finish was the factory finish. A deep red with clear coat over top.

I cleaned the plastic cowl off with soap and water. Then I used 320 grit wet/ dry sand paper and scuffed up the clear coat. I did not sand through the clear coat.

I rinsed the piece off and let the piece dry out, then applied sufficiant coats of DupliColor SUV, Truck Universal Black in the spray can with a few topcoats of clear, let dry the alloted time on the piece and that was it.

Worked like a charm.

As far as decals, you can painte over them, but I am just anal enought I'd remove those and remove the sticker residue with some Acetone and a rag. Then clean the fairings, wet sand and paint.

If you need more direction PM me.

BZ
 

PJZOCC624

New Member
Thanks Bubba. I kinda figured that's what wetsanding was, but wanted to make sure.... no, I'm an idiot. I thought maybe it was some special concoction. I appreciate the input!
 

Rhino

New Member
PJZOCC17;903 wrote: OH YEAH..... I MORE THING.....

Can Rhino-Liner be painted????

There is a product called Herculiner that is paintable, I used it on the fold-down ramp door for my trailer. It is not as shiny/sparkly a finish as the Line-X on my pick-up but it worked well. It is available at most farm/tractor supply or auto parts stores. About $100 per gallon which is enough for a shortbed truck. It will work on brick, concrete, metal, and wood .... don't know about plastic. Just take better caution than I about getting it on your skin ... you have about 30 seconds to wash it off with xylene before it becomes permanent. It took about two weeks of scrubbing the skin off my hands to get rid of it. :banghead:
 
PJZOCC17;972 wrote: Thanks Bubba. I kinda figured that's what wetsanding was, but wanted to make sure.... no, I'm an idiot. I thought maybe it was some special concoction. I appreciate the input!
Glad to help!
 

orionburn

New Member
The quality of how the actual paint will look all depends on the work you put into prepping it. My dad used to work part time at a paint shop and the guy that owned it cut me a deal on the price since I helped do a lot of the prepwork. We sanded it down to the plastic, although it isn't a must. The most important thing is to get the body work even and fill in any dings and scratches. We actually primed the panels 4-5 times. What he did is put a layer of primer down, sanded, then primed again. A trick he did to spot "defects" in the primer was to take some black primer and lightly go over the panels. By standing a good ways away it will be very spotty, but it helps bring out any raises/dents in the panels. Then we sanded, reprimed, then repeated the above steps a few more times. Pain in the arse, yes, but the results showed in the end.

If you have a lot of layers to go through start with a fairly heavy grit, say 120, to get through the rough stuff, then start working your way up to smoother paper. I want to say we did 120, then 180, then a 220 grit before we primed.
 

rk97

Member
PJ - your budget is likely larger than mine, so take this for what it's worth.

my logic was as follows: "if I'm having a hard time SANDING it off, it's not gonna fall off or chip w/o some serious effort."

the PO of my bike had also recently painted it, so sanding (electric sander) actually sorta 'melted' my paint in a couple of places. I say scuff it up, but don't bother getting anywhere near down to the original plastic unless you want to spend a LOT of time sanding.

plastics actually were easier for me to paint than my tank.

BASE COAT/PRIMER IS EVERYTHING.

a good white base coat makes everything look 100% nicer. I got impatient by the time i painted my lower fairing, and there are some obvious flaws in the final coat because of the uneven base.

I just did rattle-cans with some easy masking. the masking didn't come out so hot... it looks good in pictures, but not in person.

i dry-sanded, then cleaned the parts off, then wet-sanded, cleaned again, and primed.

if you can, try to get automotive grade clear-coat. the rattle-can clear that I used doesn't protect when gas hits it.

if you can borrow a professional paint gun, that also makes a world of difference.

total, I probably spent $32 on my paint job. that includes sand paper and tape. my folks had enough primer in the basement that I just stole that from their house.

obviously the price goes up dramatically if you want the bike to be prettier. if I could do it again:

more time priming/base coat

more careful masking (and waiting longer for my base coat to dry)

maybe a one-color scheme instead of 2 or 3, and then decals to accent that color rather than trying to mask so much.

I think my bike looks good ...as long as you don't look too close!
 

PJZOCC624

New Member
Thanks very much everyone for their input! So, I spent the whole day yesterday sanding, sanding, priming, sanding, priming, taping, base coating, recoating, slowly pulling tape..... when all was done and said, after ~$60 in paint and supplies, 7+ hrs of work, I have a paint job that looks absolutely AWFUL!!!! I don't know WHAT I did wrong.... no, maybe I do. I think maybe I sanded too much in some spots, maybe my application technique of primer and paint was bad.... what pisses me off is I spent all day working on this thing, and it looks like I spent an hour with a can of spray paint. Now I know why I don't attempt to do these things!!! So f'ing aggrevating.....

But, at least it's red!

Thanks again for all the input! Pascal, maybe I'll bring the stuff over and see if it's salvageable!
 

Pascal

Member
no worries, sounds very fixable. it's not that hard to do a track quality paint job, unfortunately it takes some time to learn how to prep everything. I give you props for trying - it's the only way to get better!
 

wess

New Member
stripping all that paint and primer off

there is a product called peeler it comes in a spray can. put wet coat on let sit for 10 or 15 minutes then rub off with bondo spreader,repeat until all paint ,primer is gone. couple of cans. (CAUTION!!! DON'T LEAVE ON IT WILL SWELL PLASTIC!!!)wash all stripper off with water, then dry sand w/p500 or wet sand w/p600 seal then paint. thin coats are your friend. I've been painting cars and motorcycles for 14 years for a livin, any ? please ask.:popcorn:
 

dialedn07

New Member
Do you have any pictures of the job you did?


1 day rattle can job.
I had only a few runs in the paint. But from my (first time/noob) experience I'd have to say take your time on it. As soon as you say "ok...this isnt so bad....BAM....run
(Obviously it was my first time.....but it came out alright)
DSCF7895.jpg
 

PJZOCC624

New Member
Thanks guys for the added input! I'm gonna give it another try over the winter. I didn't take any pics of the masterpiece however. What I did do is drop off the bodywork to my cousins' body shop. They're gonna try and clean up some of the little cracks and such, and give it a simple paint job using some of the paints they have at the shop.

Why didn't I give it to them in the first place??? I wanted to give it a try on my own, I guess. When I get it back I'll put up some pics then.

Thanks again guys!
 

stephenjpauls

New Member
I just painted my bike with a rattle can, and up close it looks fair (the surface is a little rough)... I took the time to hit some spots with a very fine rubbing compound and they look much better. When I have more time I'm going to try to rub out the rest of the bike, after that I think it will be a very respectable job for rattle can.

The process I used was,
Rough up paint on all surfaces, Sand the chips, cracks down to the plastic with 200, then 600
Prime with sandable primer (2 light coats)
wait 12 hrs
wet sand with 400 grit
Prime with sandable primer (3 light coats)
wait 24 hours
wet sand with 600 grit
Base coat (6 very light coats)
wait 48 hours (I should have waited longer but I was in a hurry to finish)
wet sand with 600 grit
Clear coat (4 light coats)
done...

As I said I need to hit with a very light rubbing compound still (too bad I put the decals on already :doh:) But when it’s done it should look good for a track bike. The reason I put the decals on is I tried to rub out a small section 48 hours after my last clear coat and it looked like crap. last night 7 days later I hit with rubbing compound and it came out much better.

The whole job took me 8 days, when you figure in 2 days for prep, and waiting 20 – 30 min between coats.
 
Top